
Recipes
If you have any recipes that you would like to share with us, please send them to [email protected]
April Bearded Sourdough
The following wonderful recipe is kindly provided by Tamworth baker Karen – find out more about Karen’s bakes on her sourdoughing it with love Instagram and Facebook pages.
Download April Bearded Sourdough Recipe
Flavour Profile
April Bearded offers an opportunity to explore the character of heritage wheat in a beautifully simple sourdough loaf. Using the flour on its own allows the grain to take centre stage, without the influence of modern bread flour.
The natural character of the wheat is complemented by the gentle acidity and depth of flavour that develop during sourdough fermentation.
Patience is particularly important when working with this flour. Although the dough may initially feel firm, allowing it plenty of time to hydrate helps the flour absorb the water properly and the dough develop before fermentation and shaping.
Recipe
Yield: 1 loaf
Hydration: 70%
Salt: 2%
Starter hydration: 100%
Ingredients
500g April Bearded Flour
50g Starter (100% hydration) in warmer months (24C+)
100g Starter (100% hydration) in cooler months (based on room temperatures below 20C)
350g Water
10g Salt
Starter percentages are calculated against the flour added directly to the dough.
Method
- Mix
Combine all the ingredients and mix thoroughly until no dry flour remains. For a single batch, everything can be mixed together at the outset. - Rest and hydrate
Cover the dough and leave it to rest for at least one full hour. It may benefit from a little longer. This is an important stage when working with April Bearded. Give the flour sufficient time to absorb the water before judging the dough’s consistency. - Develop the dough
When you begin your first stretch-and-fold, assess how the dough feels. If it is still particularly tight, add a further 10 g of water and work it in gently. There is no need to add the extra water if the dough already feels pliable.
Carry out a further 3/4 sets of stretch-and-folds allowing the dough to rest for 30 minutes between each set. - Handling
Handle the dough gently, aiming to develop sufficient strength without overworking it – April Bearded requires gentler handling than commodity wholewheat flour. - Bulk fermentation
April Bearded tends to ferment more quickly than conventional wholemeal bread flour, so keep a close eye on the dough as it develops. Don’t wait for it to double in size; by then, it may have fermented further than you want.
Use the dough’s development as your guide rather than relying solely on the clock. - How to tell when bulk fermentation is complete
Rather than relying on the clock alone, look for a combination of signs:
- A domed surface: The top of the dough should appear gently rounded rather than flat.
- Pulling away from the sides: The dough may begin to release itself from the edges of the container.
- A noticeable wobble: When you gently move the container, the dough should have a light, aerated wobble rather than feeling dense and solid.
- An increase in volume: The dough should have risen considerably and look fuller and more aerated, although it does not need to double.
- Divide and shape
Turn the dough out onto clean work surface and shape into a boule or bâtard. There is no need to bench rest. Lightly flour the dough and invert into a banneton with the seam side up.
A note on banneton size
April Bearded dough doesn’t necessarily develop the same strength and elasticity as dough made with conventional strong bread flour, so it benefits from a little extra support during its cold retard.
I use a slightly smaller banneton than you might typically choose for this dough weight: an 18cm round banneton for a boule or a 21cm oval banneton for a bâtard. The closer fit helps support the sides of the dough, encouraging it to hold a more upright shape rather than spreading outwards while it rests in the fridge.
It’s a small adjustment, but one that can make a real difference to the shape of the finished loaf.
- Scoring
Scoring means cutting the surface of your dough just before baking. These cuts give the loaf a controlled place to open as it expands in the oven – known as an expansion score.
Use a sharp bread lame or razor blade and make clean, confident cuts without pressing down on the dough.
For a boule (round loaf)
Score the top of the boule into quarters by making two cuts that cross in the centre, forming a cross. This simple pattern is easy for beginners to follow and gives the loaf a neat, attractive finish.
For a bâtard (oval loaf)
Make one straight cut across the centre of the loaf, from one side to the other. Hold the blade upright and cut confidently through the surface of the dough.
A few tips
- Score immediately before baking.
- Use a sharp blade for clean cuts.
- Make each cut in one confident movement.
- Handle the dough gently to preserve the air developed during fermentation.
- Bake until the crust is well coloured and the loaves are fully cooked. Allow them to cool completely before slicing.
- Baking Your Loaf
Lift your dough using the baking parchment into your lidded baking vessel – a dutch oven or enamel roasting tin is perfect.
Place into your cold oven and set temperature to 230c (fan) and bake for 30 minutes with the lid.
Remove the lid and bake fur a further 10-15 minutes without the lid until desired colour is achieved and the loaf sounds hollow when tapped on the bottom.
- The Hardest Part: Waiting!
I know, I know. Your kitchen smells amazing, the crust is calling your name, and all you want to do is cut yourself a slice. But please, step away from the bread knife!
Your loaf is still working its magic as it cools. The crumb inside is setting, and the moisture is redistributing throughout the bread, helping it develop that lovely texture you’ve worked so hard to achieve.
Cut into it too soon and you risk a gummy, sticky crumb and squashed slices. All that patience during fermentation, and now the bread wants you to wait a little longer. Honestly!
Transfer your loaf to a wire rack and let it cool completely before slicing. Put the kettle on, find something else to do, or simply admire your handiwork from a safe distance.
Trust me, your bread will thank you for it. And so will your slices!
A note on the cold oven method
If you’re used to preheating your oven and Dutch oven before baking sourdough, this method might seem a little controversial! However, ovens vary in how efficiently they heat up, and preheating both the oven and a heavy pot uses additional time and energy.
For this method, simply place your shaped and scored loaf into a cold Dutch oven or lidded enamel roaster, put it into the cold oven and set the temperature to 230°C. The pot and loaf heat up together as the oven comes to temperature.
I promise it works! It’s a straightforward, energy-conscious approach that produces a lovely loaf without the need to spend time heating an empty oven and pot.
Download April Bearded Sourdough Recipe
Cornovii Heritage Sourdough Hearth Loaf
An artisan hearth loaf which brings out the distinctive character of Cornovii flour.
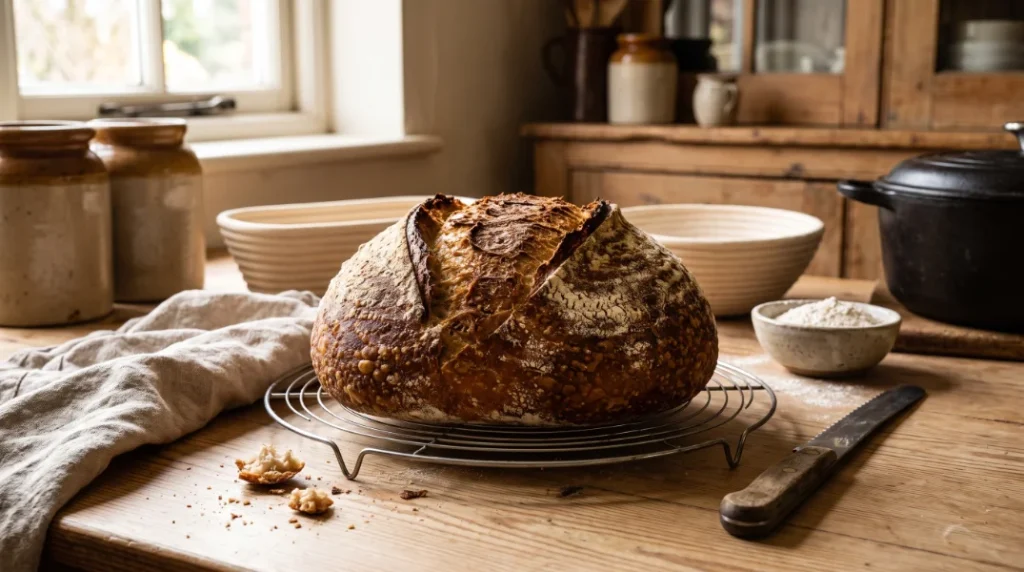
This artisan hearth loaf is designed to showcase Cornovii, a stoneground heritage population flour developed from seven historic winter wheat varieties (including Hen Gymru, Holdfast, Yeoman, and Red Lammas). Cornovii typically has a protein content around 12.8% and is known for its warm, slightly spiced, cinnamon‑like aroma and nutty depth.
Heritage stoneground flours often form a more delicate gluten network than modern roller‑milled strong bread flours. They respond well to gentle stretch‑and‑folds rather than long, aggressive kneading, and work best at moderate hydration (around 70–73% in this recipe).
Ingredients
|
Ingredient |
Metric |
Baker’s Percentage |
|---|---|---|
|
The Fold Cornovii Organic Flour |
450gm |
90% |
|
Strong White Bread Flour (optional, for structure) |
50gm |
10% |
|
Lukewarm Water (~26C-28C) |
350gm |
70% |
|
Active Sourdough Starter (or 4gm dried yeast) |
100gm |
20% |
|
Fine Sea Salt |
10gm |
2% |
(Note: You can use 100% Cornovii flour (500 g). Adding 10% strong white flour gives extra dough strength if you are newer to working with heritage stoneground grains.)
Method
Mix
In a large bowl, mix the flour and 330 g of the water until no dry patches remain. Cover with a damp cloth and leave to rest for 45 minutes. Heritage grains absorb water more slowly, and this resting period softens the bran and kick-starts gluten formation naturally.
Knead gently
Spread the 100 g of active starter over the dough, dimpling it in with your fingers. Add the 10 g of salt and the remaining 20 g of water. Squeeze and fold the dough gently until the starter and salt are fully integrated and smooth.
First rise
Cover the bowl and keep in a warm spot (around 22-24°C) for roughly 4 to 5 hours. Perform 3 to 4 sets of gentle “stretch and folds” (or coil folds) spaced 30 minutes apart during the first 2 hours. Handle the dough gently towards the end so you do not tear the delicate heritage gluten structure. Bulk fermentation is complete when the dough has expanded by roughly 40–50% and feels aerated.
Shape
Tip the dough out onto a lightly floured bench. Shape into a loose boule or batard by pulling edges into the centre, flip it seam-side down, and use your hands to build gentle surface tension. Dust an oval or round banneton (proving basket) with rice flour or Cornovii flour, place the shaped dough seam-side up inside, and transfer it to the fridge for a cold overnight retard (8–14 hours).
Bake
Preheat a heavy Dutch oven or baking cloche inside your oven at 240°C for at least 45 minutes. Turn the cold loaf onto parchment paper, slash the surface with a baker’s lame or sharp blade, and transfer it directly into the hot pot. Bake with the lid on for 20 minutes, then remove the lid, drop the temperature to 210°C, and bake for another 18–22 minutes until deep amber-brown.
Cool
Allow the loaf to cool completely on a wire rack for at least 2 hours before slicing. Cutting into warm heritage bread can compress the crumb and make it gummy.
Tip: If the dough feels very sticky, hold back 10–20 g of the water at the start. Heritage flours can vary in how much water they absorb.